Setting Up
Your Ookkie
Setting Up
Your Ookkie
Your Ookkie
WARNING! The Ookkie® skateboard requires assembly by an adult before riding. Please keep the pieces out of child’s reach while assembling your Ookkie.
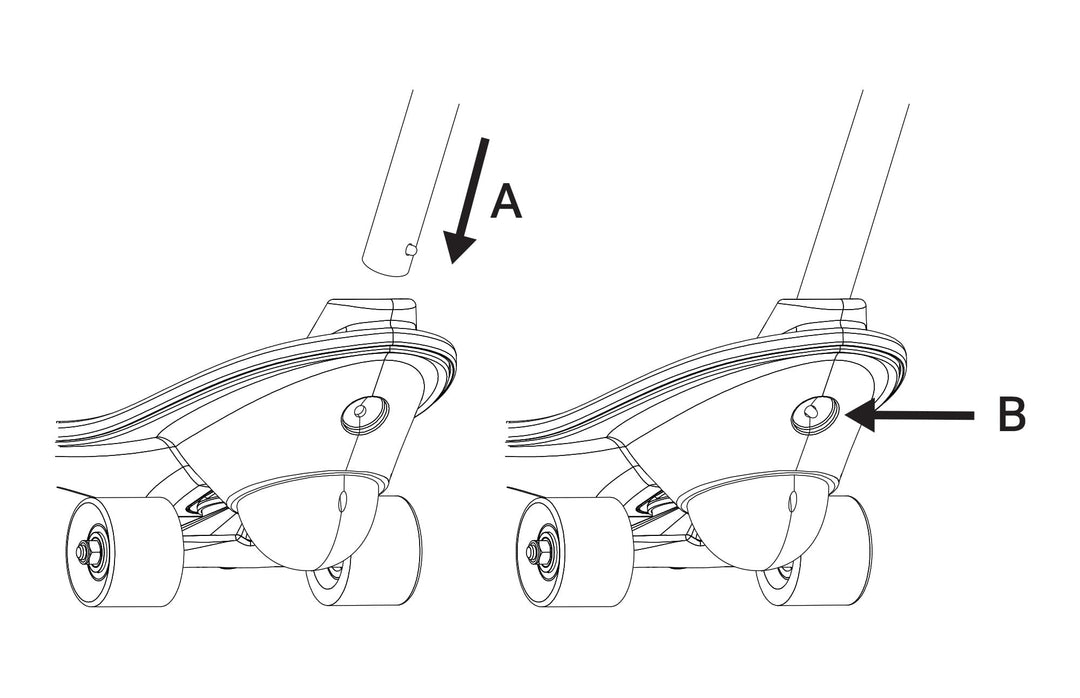
Insert the Children's Handle Pole (A) into the skateboard. You will hear a ‘click’ when it locks into place correctly. Confirm the pole is locked by looking for the Silver Button (B).
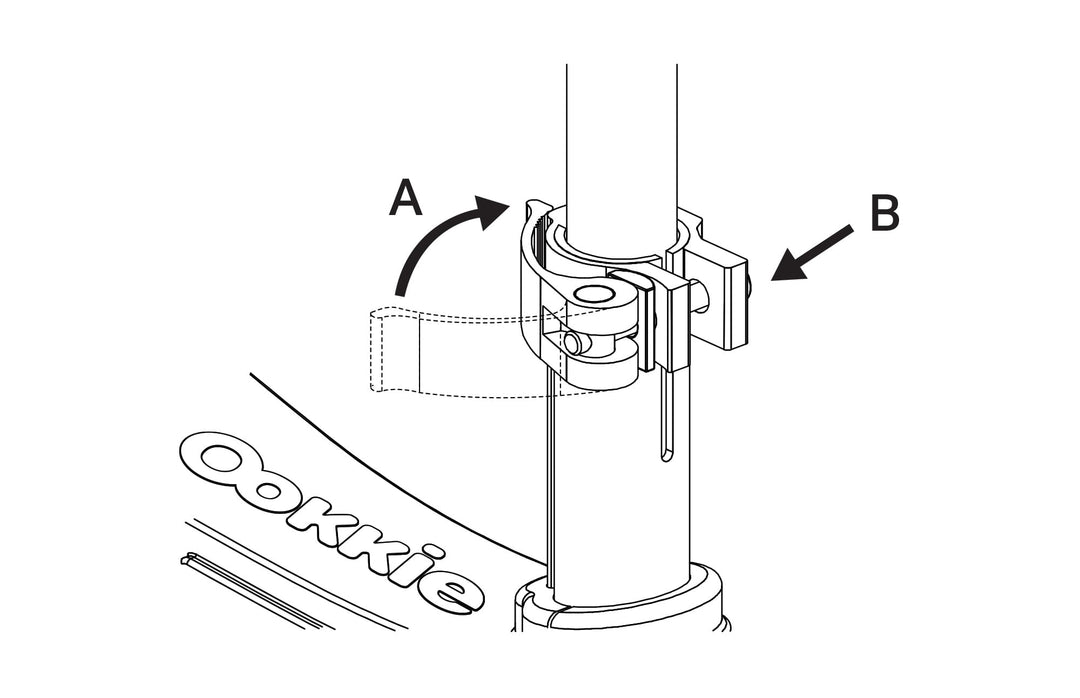
Open the Cam Lock (A) on the children’s handle and insert the Pole of Parent’s Handle (B). Make sure to hold in the silver button on the pole as you insert.
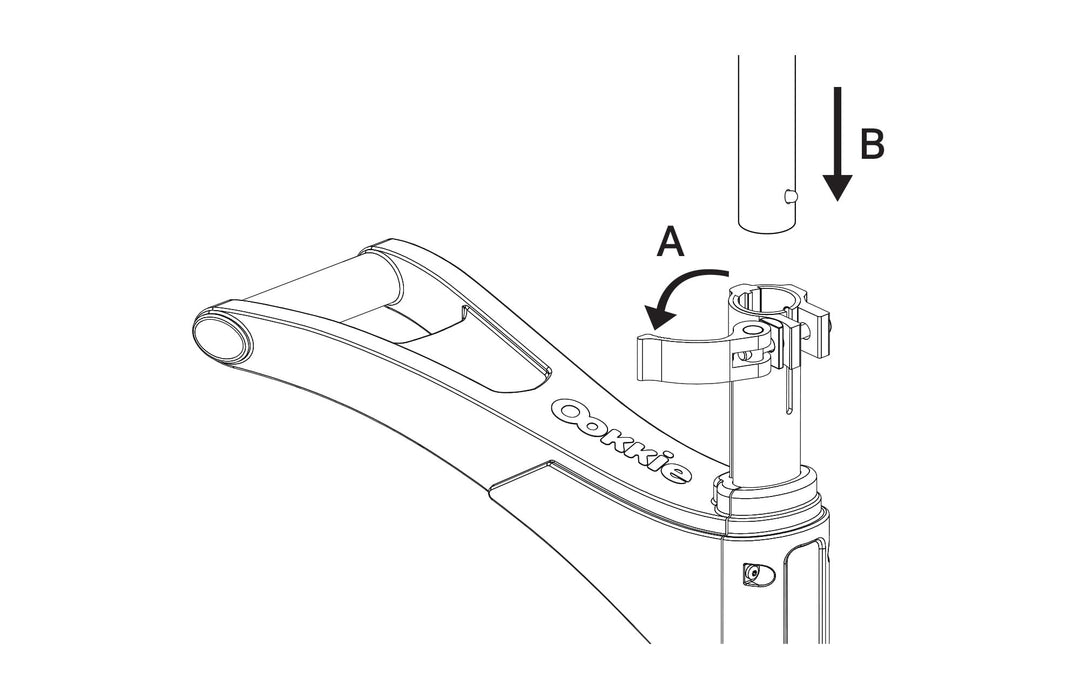
Slide the parent handle down until you see the Silver Button (A) lock into one of the holes of children’s handle pole. The hole you select should be comfortable for your height.
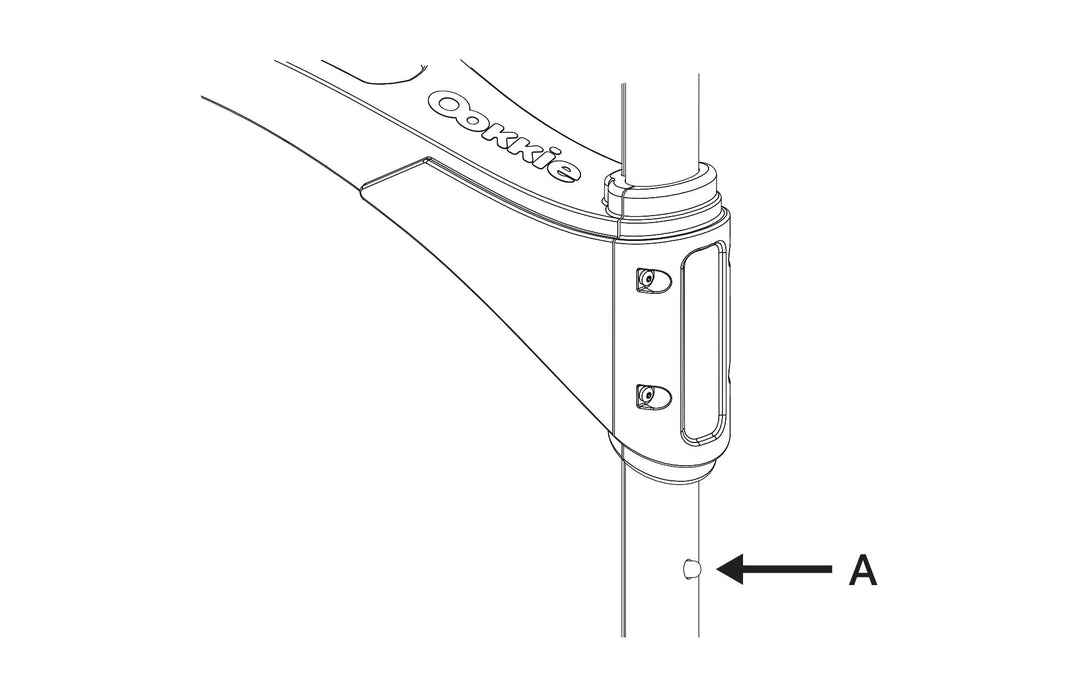
Use the Cam Lock (A) to lock the poles together by rotating the lever. Tighten clamp if required by rotating the Bolt (B) and lock.
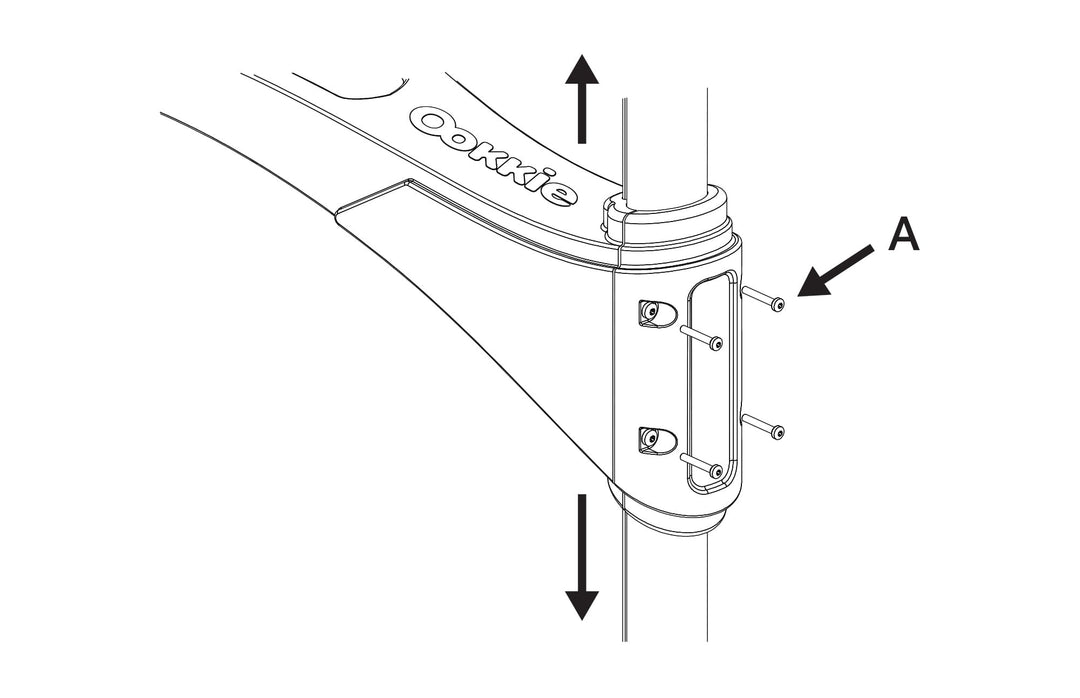
If required, adjust the height of the children’s handle to suit the height of your child. This can be done by loosening the Screws (A) with a Phillips head screwdriver and then retightening when the handle has been placed at the correct height.
Yes, we designed all the handles on the Ookkie to be height adjustable ensuring children of all heights will be comfortable learning on our skateboard.
Yes! The wheels, bearings and trucks are universal which means you will be able to modify/change these parts. We will not, however, cover any damage which occurs whilst modifying or changing parts.
Australia Wide
Trusted Worldwide
Designed Specifically For Children